 Back on my first Sideband post, I wrote that, “Sideband posts are miscellaneous thoughts that accompany the main thread of posts. Think of them as small paths that meander off the main road. Some branch off, go a short ways and die after a short while. Others are scenic trails that follow along the main road.”
They never quite achieved that vision, so this year one goal is getting Sidebands back on track with that original “mission statement.”
And I’m going to start with fun topic: computer-generated 3D images!
The whole project was about getting this one shot!
The topic is a doubly perfect Sideband. Firstly, it introduces an ongoing topic that is definitely a detour from the usual stews and chili served here. (Admittedly not a huge detour, but not a topic I had ever thought to write about. For one thing, my skill set here is rudimentary at best.)
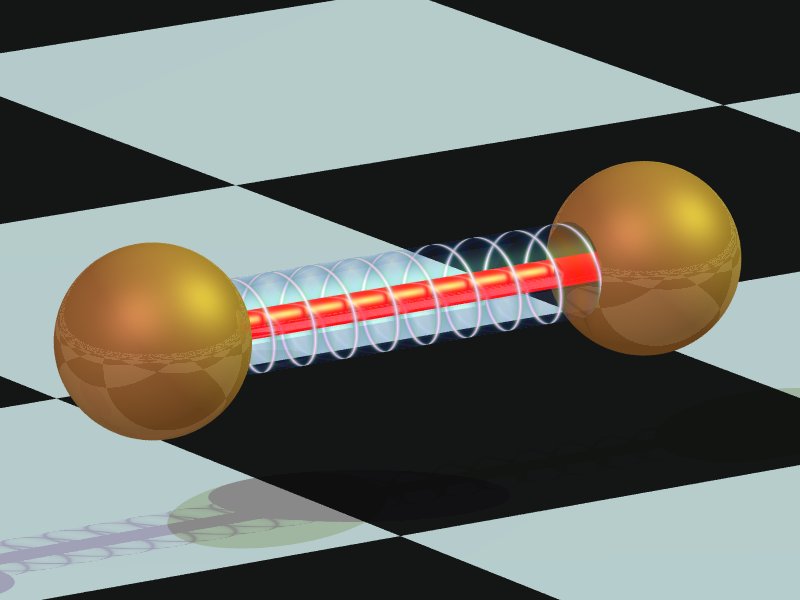
Secondly, the Sideband image, that odd gold electrode thing in the image that leads most SB posts… That’s a computer-generated image I created several years ago using the very technology I’m going to write about.
I’ll get to that in more detail down the road. For this introduction I’m just going to take you on a tour of the theatre I “built” using POV-Ray, a (free!) ray-tracing program. I built this theatre to simulate a time in high school I performed the “RGB” experiment described in the Color My World post yesterday. I’ll also try to cover a few details I didn’t have room for yesterday.
As I mentioned above, I’m not very good at this. If you visit the POV-Ray site, you’ll see some astonishing work that makes mine look like Logo toys. I dabble and have a ton of fun (you could, too), but I’m strictly a newbie at this.
And on that note, without further ado, I give you the Wyrd Smythe International Fine Arts Theatre and Bait Shop. [Click any photo for a big’n.]

The theatre from above and to the south-west. The dome is 150 feet high, making the theatre a football field across. You see the south and west entrances and the stage (the square part in back). The area is lit with four giant lights. Currently the area surrounding the building is grass.

Standing on the walkway west of the theatre. You see the west entrance and the stage to the left. Note the “backstage door” (the red brick affair).

Standing just outside the backstage door. (I haven’t actually made a door, yet, so you can look through the open doorway into the theatre. If you look very closely, you might see some stuff apparently going on on stage!)
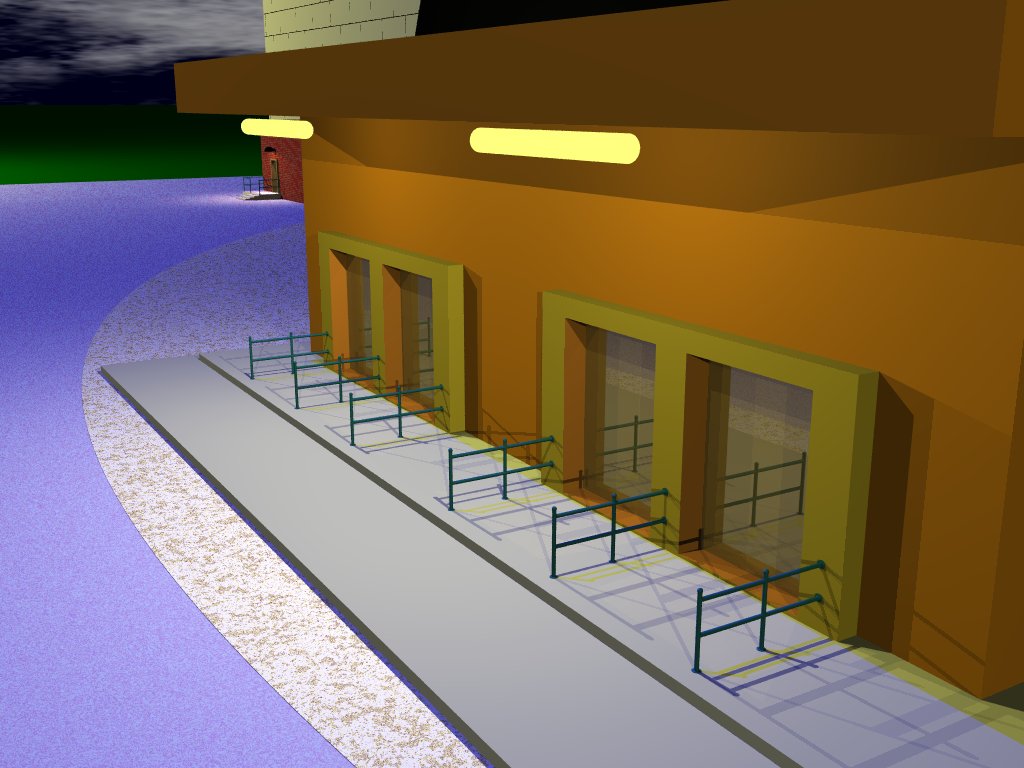
A close look at the west entrance (the east and south are the same). Later I’ll tell you how much goes into making just those railings! For now, I’ll just mention that each consists of 10 separate objects. The upside is that you only have to design one. Then you can replicate that design where needed.
High up in the dome looking down at the stage. You see two of the house lights (one close, one far), as well as come “work” lights down on the floor by the pillars (one’s hidden behind the left one). Couple “people” on stage, too!

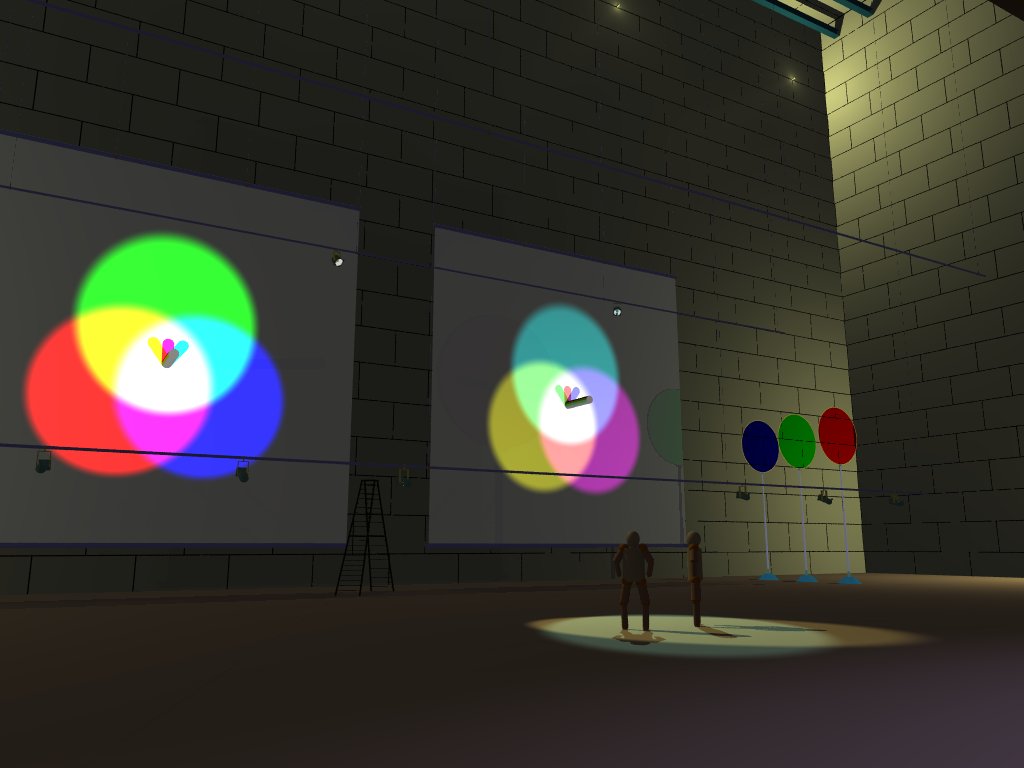
Looking across the hall to the stage from the south entrance. The stage is about 300 feet away. Seems to be some sort of color demo on stage…

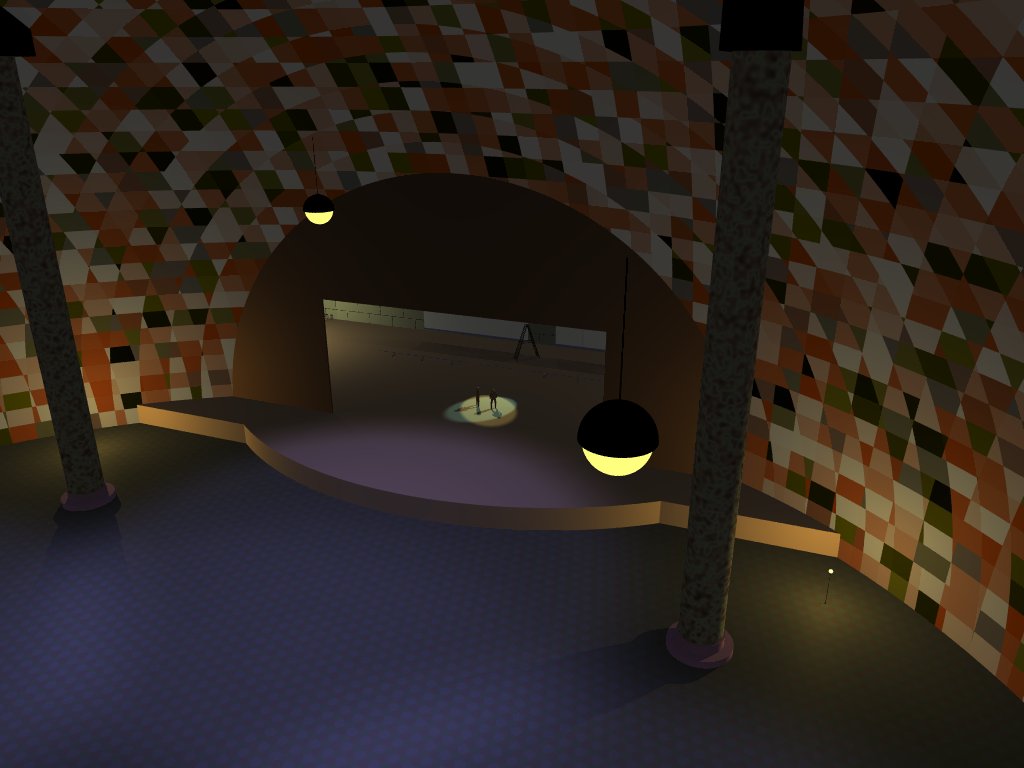
Standing up close to the stage (on the house left side). The backstage entrance is at the far back. You can see a ladder bolted to the wall. It leads up into the “fly gallery,” a tall space above the stage.

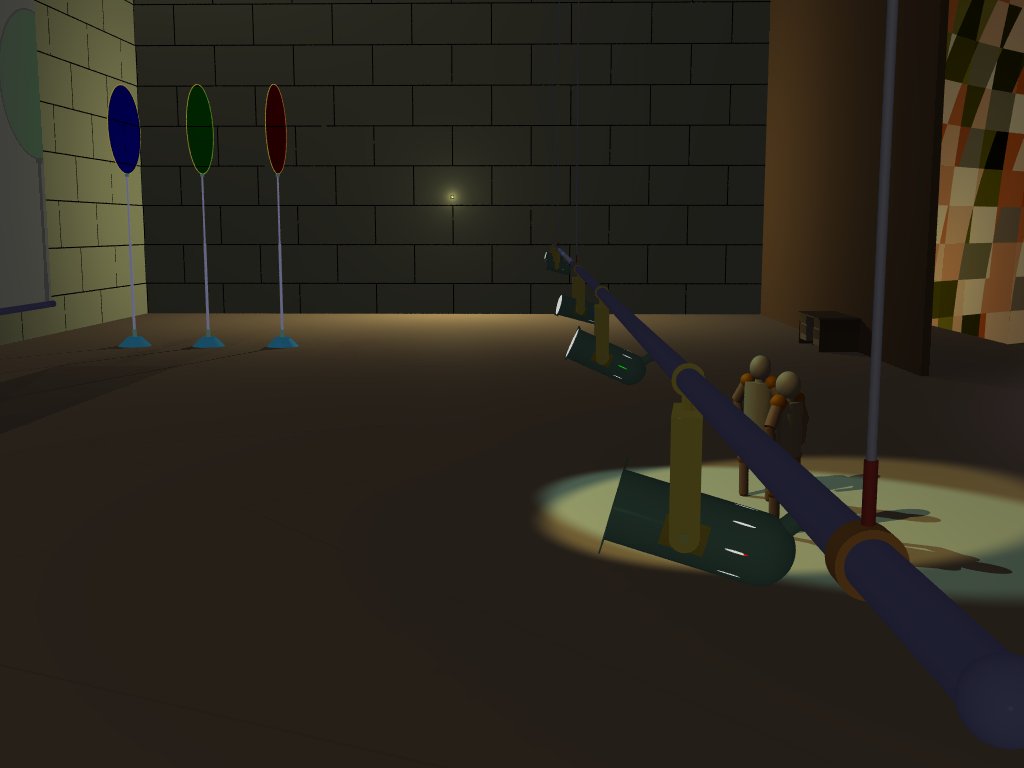
Now we’re standing on stage (upstage left and actually off-stage). We’re looking out into the house. You can see the west entrance and the backstage door area. (I wonder what that red filter on a stand is for…)
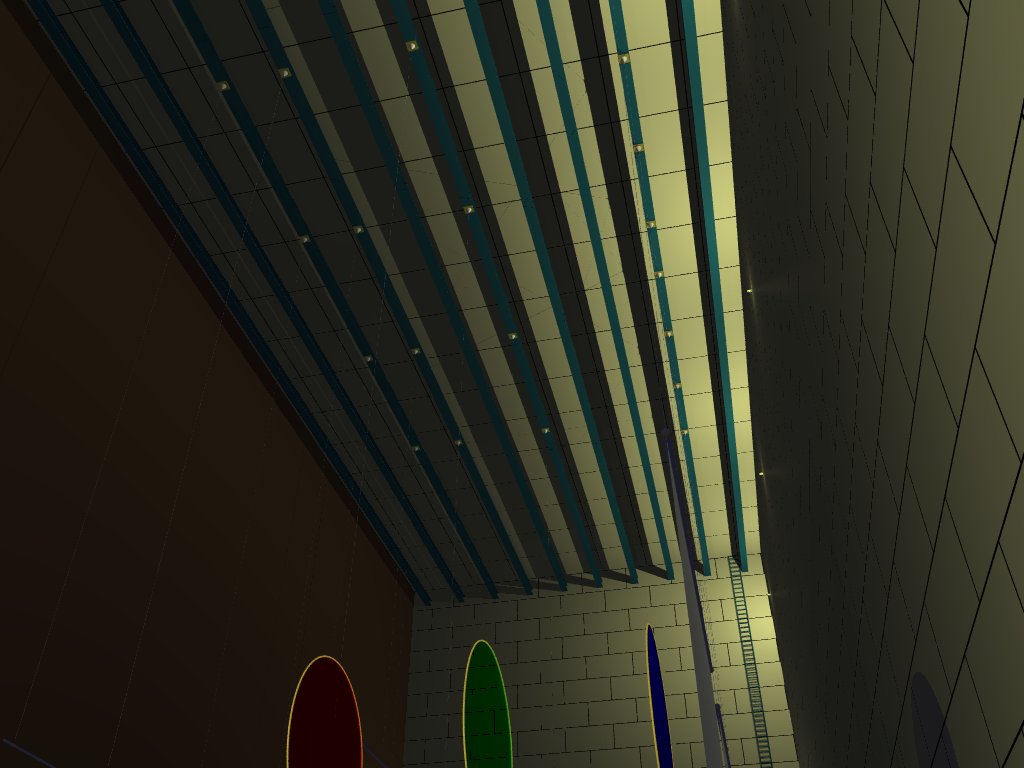
Same position, but looking up into the fly gallery. You see all the I-beams used for suspending “battens” (pipes used for hanging lights, curtains and various stage pieces). Looks like that red filter has a green and blue friend.

Up in “the flies” looking down at the “ants” center stage.
A close shot of one of the battens and the lights hanging from it. In the foreground, you see the cable that suspends the batten.

Here’s the “glamor shot” that closely resembles what I saw 40-some years ago in that dark theatre. It was a jaw-dropping sight to see even expecting it!

In the POV-Ray posts ahead, I’ll show you how this light is created. For now I’ll just say it consists of 15 visible geometric forms (plus one that isn’t).

I’ll also show you how these “bar stools” are constructed. In fact, I’ll probably start with these, since they’re fairly simple. (I do like how they turned out.)

And finally, I’m going to teach you how to use an abacus using a CG abacus I created! I’ll include a photo of my real one for comparison (I got close!).
I hope you enjoyed the tour and will join me again when I explore the world of 3D raytracing! (I’ll cover those last color topics in another post soon!)


January 22nd, 2013 at 7:42 pm
This is SO over my head, but I enjoyed the tour! You’re kind of a computer nerd, aren’t you?
January 22nd, 2013 at 7:46 pm
Kind of?! Have you met me, yet?? 😀
I live and breath this shit!
And stick around. The tour was just for fun and show. In the future, I’ll break it down in a way that I hope you will find interesting and educational. (No math will be involved, no homework assigned, but I will need to talk a bit about geometry.)
January 22nd, 2013 at 8:35 pm
no math eh? that might work!
January 23rd, 2013 at 12:48 am
I promise!
January 22nd, 2013 at 8:29 pm
Reblogged this on cftc10.
January 23rd, 2013 at 12:47 am
Heh! You’re just a re-bloggin’ maniac, aincha! 😀
January 23rd, 2013 at 7:42 am
I’m sort of geeky, too, so I can’t wait to see the follow up posts!
January 23rd, 2013 at 8:31 am
Birds of a feather are we! I’m going to try to get them out ASAP. I keep starting topics and then having a hard time getting back to them (so many topics, so little time), so I’m going to make an effort now to cluster posts related to a given topic.
Great of you to stop by!
July 21st, 2013 at 11:44 am
Nice work, especially the lights, filters, etc. I’m still learning the syntax for POV-Ray textures, and how to work with glass, mirrors, etc. I’d love to hear any tips you have for laying out and aligning scenes – maybe share some POV code. Keep up the good work!
July 21st, 2013 at 12:18 pm
Thank you! This is a topic I plan to return to in the very near future. I have those color posts to wrap up, and I have other POV-Ray topics planned. I am just a dabbler with the product, though. There are those out there who have created some jaw-dropping scenes.
I’m not sure what useful tips I can offer; if you have any specific questions I’ll try to answer them. In the future I will be describing my set up and how I go about things. Stay tuned!
January 15th, 2023 at 5:54 pm
[…] the model of my own place (interior only), but I doubt I’ll ever finish that baseball park or theatre building. Or improve my […]
January 24th, 2023 at 2:50 pm
[…] I’ve been meaning to write an Abacus post for years. I used one in my first job, back in high school, and they’ve appealed to me ever since. Many years ago I learned there were people who had no idea how an abacus worked. Until then I hadn’t internalized that it wasn’t common knowledge (maybe a consequence of learning something at an early age). […]