 Recently I took you on a tour of a virtual theatre I “built” to help illustrate a post about light and color. It’s virtual because it wasn’t built with wood or metal or rock, but only with 100% natural electrons grown in the U.S.A. (free range; no pesticides or antibiotics).
I also showed you some smaller objects I built with the same tool: a freeware ray tracing application, called POV-Ray. The application is a “rendering engine.” It takes your design and renders it as a 3D image, complete with textures, shadows, reflections and a variety of other life-like effects.
Today I’m going to take you down into the engine room!

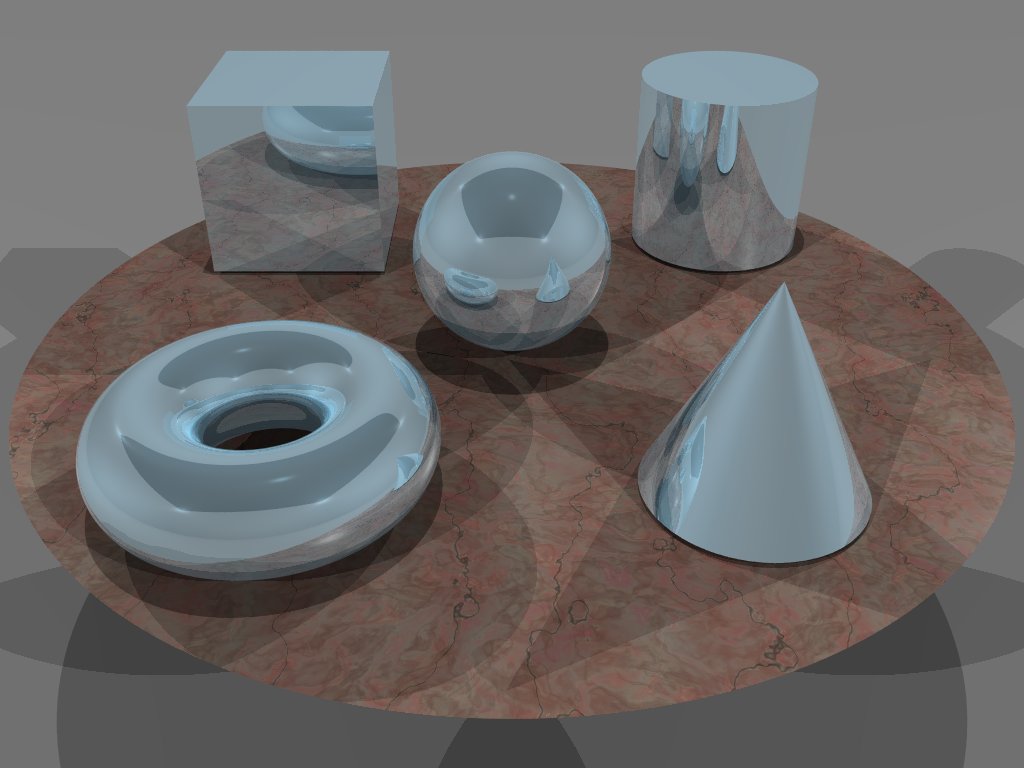
The five basic shapes with a plain matte finish.
Let’s start at the very beginning. We call the design that POV-Ray renders a scene.
If you just thought, “Like a movie scene?” that’s exactly right. It is like a movie scene in that we need lights to make the scene visible.
It also needs a “camera” in it to represent the point of view.
Part of the process is deciding where to put the lights and where to put the camera.
[In the event you hadn’t made the connection yet, POV stands for “Point Of View” and is a term of art in film making. It’s used in scripts to indicate a camera view from a given character’s perspective. It has come to mean “opinion.”]
So, a scene has (one or many) lights to provide illumination, and it has a camera to “take the picture” of the scene.
The five basic shapes with a blue metallic finish. Ray tracing is good at rendering reflections!
A scene also needs objects in it, otherwise we’re just staring off into empty (if well-lit) space.
Unlike a real movie scene, where the set department builds you a physical set, and the prop department fills it with props, in a POV-Ray scene, you must make everything.
And I do mean everything, but that’s actually where all the fun comes in.
(Assuming you can define as “fun” spending a lot of hours on a single art project. The theatre I built took many days of work spread out over many weeks. Even so, it’s a very simple piece of work; more a sketch of a theatre.)
We design objects in POV-Ray using basic building blocks (shapes) and tools that let us manipulate those shapes. We add shapes together to make more complex shapes.
We can also use one shape to change another. For example, a cylinder shape can “cut” a hole through a sphere shape.
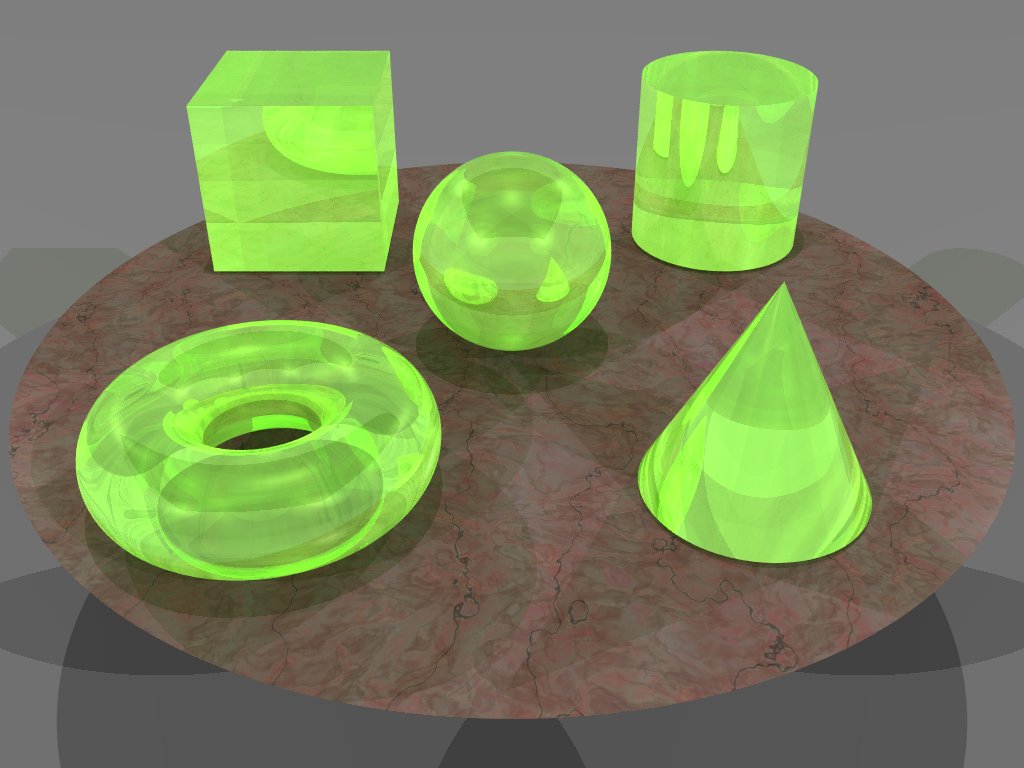
The five basic shapes with a green glass finish. Ray tracing is also good at transparency!
There are five basic shapes in POV-Ray as well as a number of other more specialized ones.
The three images above and right show the basic five. They are: sphere, box, cylinder, cone and torus. The five shapes are hovering just above one of the specialized shapes: a disc (it has a diameter, but no thickness).
In each image a different kind of “finish” or texture is applied to the object. The “table” (the disc below the shapes) has a stone texture.
(Click on any image for a full-sized version.)
These different textures serve to illustrate how ray tracing can do reflective and transparent objects.
The topic of object texture is an advanced one I won’t explore further. I will mention that textures and lighting are the real art of computer-generated images. The three very simple examples I’ve shown you provide some idea just how strikingly different textures can be.
Yet these examples just scratch the surface.
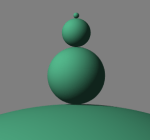
I’m not going to get too deep into the actual POV-Ray code, but to give you a taste, below is the code for a scene that is about as simple as it gets: a camera, a light and a sphere (the image it creates is shown in the upper right).
// A simple POV-Ray scene.
// (It doesn't get much simpler!)

background {color rgb 0.50}

sphere {
    <0,5,0>, 1.0
    texture {
        pigment {color rgb <0.33, 0.72, 0.55>}
        finish {ambient 0.2 diffuse 0.8}}}

light_source {<-10,10,-10> color rgb 1.00}

camera {location <0,5,-5> look_at <0,5,0> angle 40}
The scene above defines four things: the (gray) background color, a (teal) sphere, a white light and the camera. (The four definitions can be in any order.)
A sphere has a radius.
The sphere is centered on the X-Y-Z coordinate (0,5,0), which puts it in the “center” of things and five feet high.
It has a one-foot radius and a teal-colored texture.
The light is 10 feet “west,” 10 feet high and 10 feet “south.”
The camera is five feet high and five feet “south.” It’s looking at the sphere with a zoom angle of 40 degrees.
Now there are two important things to understand about how we use shapes.
The first is that we control various parts of the shape. What we control depends on the shape. A sphere’s only control is its radius. A cylinder has a radius and a length. We can make short fat cylinders (like a round plate) or long skinny ones (like a long straight wire).
Ways to scale a sphere.
The second important thing is that we can scale (re-size) shapes.
And it’s much cooler than just scaling them up or down. We can scale them separately on all three dimensions! That lets us squish and extend them.
I’ll close with some simple examples of how we combine shapes to create new shapes. The process is called constructive geometry, and as I mentioned above, you add and subtract shapes to create new shapes.
 Let’s start with adding shapes.
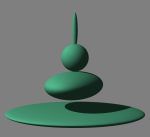
When I created the abacus, I needed a shape to be the “stones” of the abacus. I tried various ways of just squashing a sphere, but I didn’t care for the results.
The stones in my (real, physical) abacus are basically flat cylinders with curved sides.
In fact, a cylinder would almost do the trick, except that the straight side and the edge between the ends and the side are just (pardon the pun) flat-out unattractive. We need something more curvy.
It turns out that adding a torus to a cylinder gives us the curvy sides we want while also giving us the flat top.
You may notice (and wonder about) the light green effects used to help show how the cylinder and torus are merged. These are actually two other cylinders I added (and made very transparent) to illustrate the merging shapes. The total scene for that image contains four cylinders and two torus shapes (see them?).
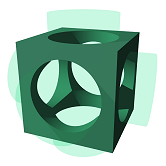 To the right is a very simple subtraction example that uses three cylinders to cut holes in a box shape.
Note that the box shape can have any dimensions, but boxes in POV-Ray are always rectangular. The corners always contain 90° angles.
As in the addition demo, I’ve added special “green glass effect” cylinders to illustrate how the holes are made. Normally, the box would just have holes in it.
Next time I’ll expand on these techniques, and we’ll build something a little bit more interesting than a box with holes or an abacus stone.


January 25th, 2013 at 4:44 am
“only with 100% natural electrons grown in the U.S.A. (free range; no pesticides or antibiotics).”
Funny line! I ignored the coding part, enjoyed the images and am trying to follow along. I suspect my brain will demand that I stop trying to understand it and just appreciate the effort.
January 25th, 2013 at 9:23 am
Thanks! I thought of that line about a week ago, wrote down on a Post-It note and then forgot to use it three times running. I was massaging the opening last night when the light bulb finally went off. (Those openings can be a real bear. I’m shooting for three, maybe four, graphs “above the fold” that introduce the topic and end on a teaser (ideally the last graph being one short sentence). That’s the hardest part sometimes!)
Feel totally free to ignore the code. I probably won’t be showing much more of it. That was just to provide a sense of how it’s done. Would be of interest mainly to those considering trying their hand at it and were wondering about the process.
I guess the real point being it’s an imagining-and-then-writing process; you write “code” that describes the scene. It’s not a drawing process or a visual object manipulation process when you use POV-Ray by itself. There are other applications that do provide tools for drawing or and manipulating objects visually. What I’m doing is similar to “baking from scratch” and almost similar to growing and milling your own wheat first.
August 5th, 2023 at 3:49 pm
[…] promised last time, my simple tour of POV-Ray continues with some examples a bit more interesting than an abacus stone […]